Sometimes, you’ll have to move or delete certain pages on your website. It’s the circle of [website] life.
But if you do move or delete a page, users could potentially be presented with a 404 error that prevents them from accessing your content, often leading to an exit. If you don’t properly set up redirects, you may increase your bounce/exit rates, which harms user experience (and potentially organic rankings).
Fortunately, it is easy to create 301 redirects in WordPress — by adding a 301 redirect for moved or removed pages, users (and search engines) will be whisked off to the new, updated URL. Whether you use a redirection plugin or edit your site files, building 301 redirects can effectively fix any broken links on your site.
In this post, we’ll explain what 301 redirects are and when you might want to use them. Then, we’ll show you four ways to create a 301 redirect in WordPress. Let’s get started!
An Introduction to RedirectsTo get started, you’ll need to know what redirects are. Put simply, any redirect will send users and search engines to another web address. This automatically redirects the requested URL to a different location.
As a website owner, you can use a temporary or permanent redirect to prevent your visitors from seeing error pages. These “Not Found” errors, otherwise known as 404 errors, inturrupt the browsing experience and can lead to visitors exiting your website.
A 404 error is an HTTP status code that indicates that the page a user is trying to access does not exist. 404 errors can occur for a wide variety of reasons, but they almost always lead to a poor User Experience (UX).
Read MoreThere are many other different redirect types as well. Each one sends a unique HTTP status code from a web server to a browser. These codes indicate how the content is being moved.
Here are the most common URL redirect types:
- 301: Permanent redirect from one URL to another.
- 302: Temporarily redirect to a new URL.
- 303: Non-cacheable redirect to temporarily replace content.
- 307: Informs search engines that the redirect may periodically update.
- 308: Permanent redirect that disallows changes from POST to GET request methods.
- Meta refresh: Client-side redirect that often appears as a refresh countdown timer.
By far, the most used redirect type is a 301 redirect. This will inform both search engines and online users that the original resource is no longer available. Instead, it will permanently redirect to a new page.
Whenever someone clicks on the original link, they’ll automatically be taken to a different URL. The redirect will seamlessly direct users to the correct pages on your website and prevent them from seeing 404 errors.
Reasons You Might Use a 301 RedirectSince there are different redirect types, it can be difficult to know which is right for your website. Fortunately, 301 redirects are useful when performing a few essential management tasks.
One of the most common reasons to use a 301 redirect is when you’re deleting old content. If a post is no longer relevant but still receives traffic, you’ll want to take these users to an updated resource.
In this case, 301 redirects tell search engines that you’re permanently moving the URL. Since it will preserve your traffic and backlinks, this redirect can improve your Search Engine Optimization (SEO). However, keep in mind that it can take time for search bots to discover the new page and associate it with the same ranking.
Additionally, you may implement 301 redirects if you’re moving to a new domain. If you don’t redirect your URLs, you may quickly lose your current audience. However, 301 redirects will seamlessly take visitors to your new location.
Similarly, a 301 redirect can be useful when moving from an HTTP to an HTTPS connection. To make sure users visit the secure version of your website, it’s best to permanently redirect your content.
You might also want to consolidate separate posts. After compiling the information onto one page, you can redirect all the old links to the new location.
Subscribe to our blog and receive great content just like this delivered straight to your inbox.
Now that you know about 301 redirects, you may want to apply them to your website. Let’s discuss some best practices when creating 301 redirects in WordPress!
Method 1: Install a Redirection PluginOne of the best ways to extend the native functionality of WordPress is to install a plugin. Fortunately, there are many useful plugins available for creating and managing your website’s redirects.
For example, Redirection is a free tool that adds a redirect manager to your site. You can use this plugin to set up 301 redirects, track broken links, migrate permalinks, and much more:

To get started, install and activate Redirection in WordPress. Then, navigate to Tools > Redirection. On this welcome page, click on Start Setup:

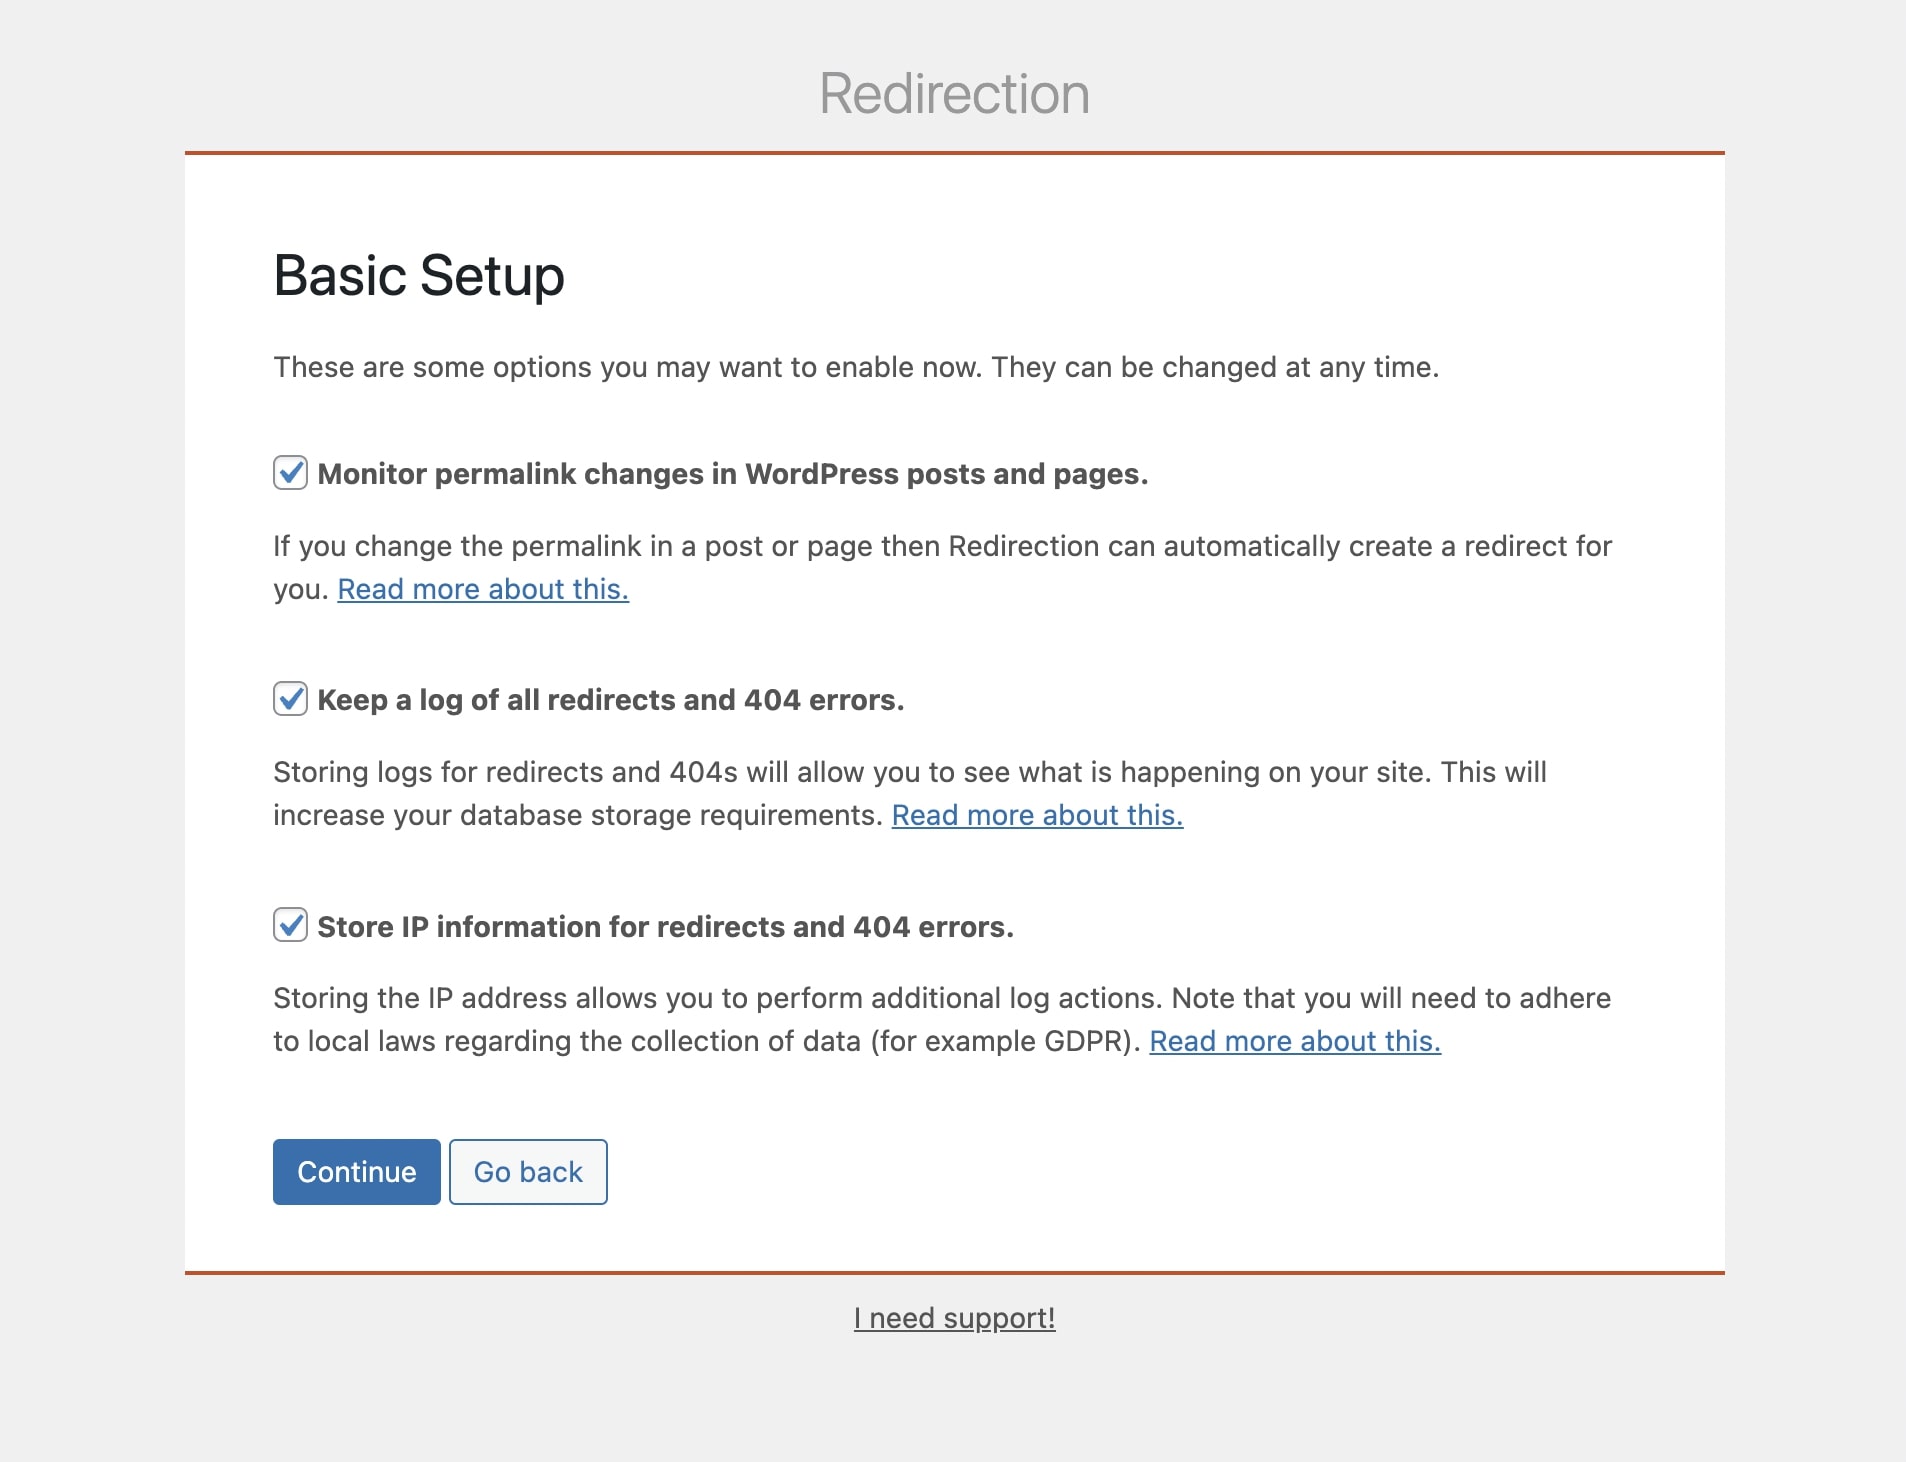
For the next step, you’ll need to decide whether you want Redirection to monitor permalinks, redirects, and 404 errors on your site. If so, enable these options and select Continue:
After this, the plugin will test your REST API to see if it can communicate with WordPress properly. Once you receive a ‘Good’ rating, you can click on Finish Setup:

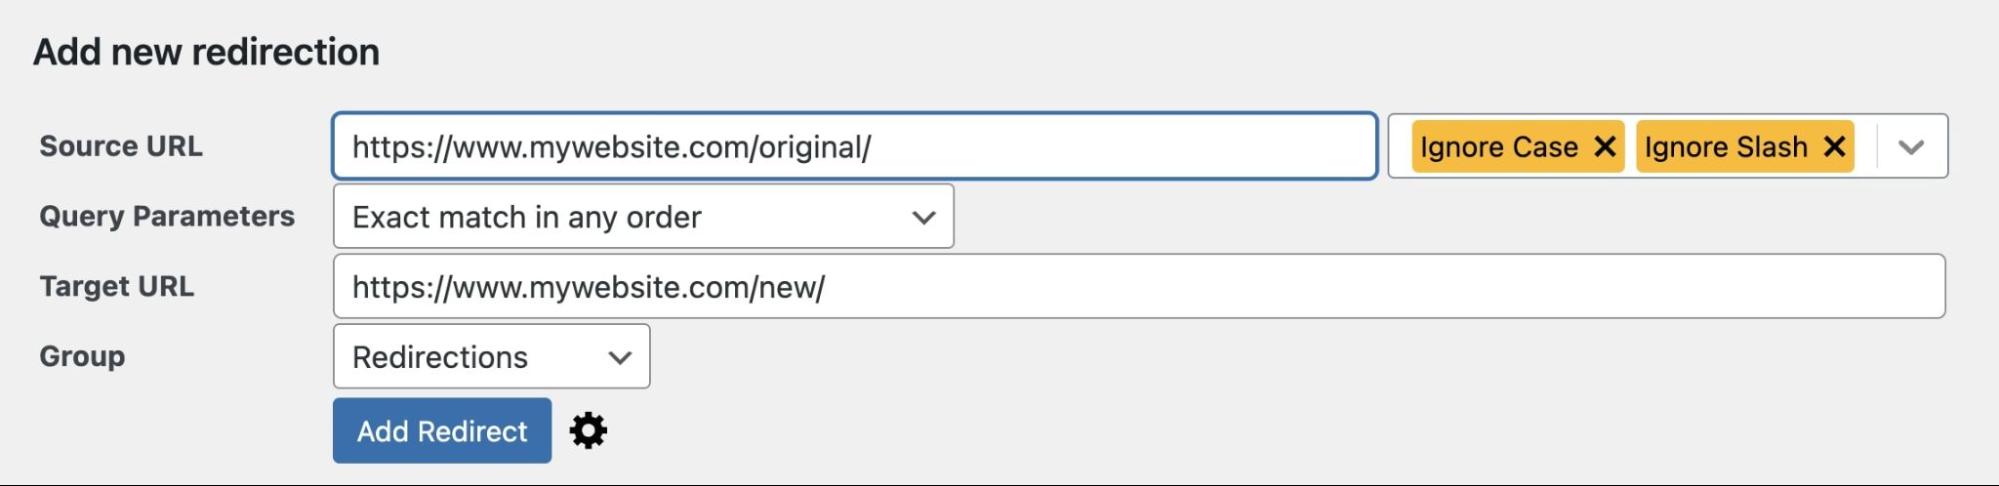
Now you’ll be able to create a 301 redirect! To do this, find Tools > Redirection > Add New. Then, add your source URL and target URL:
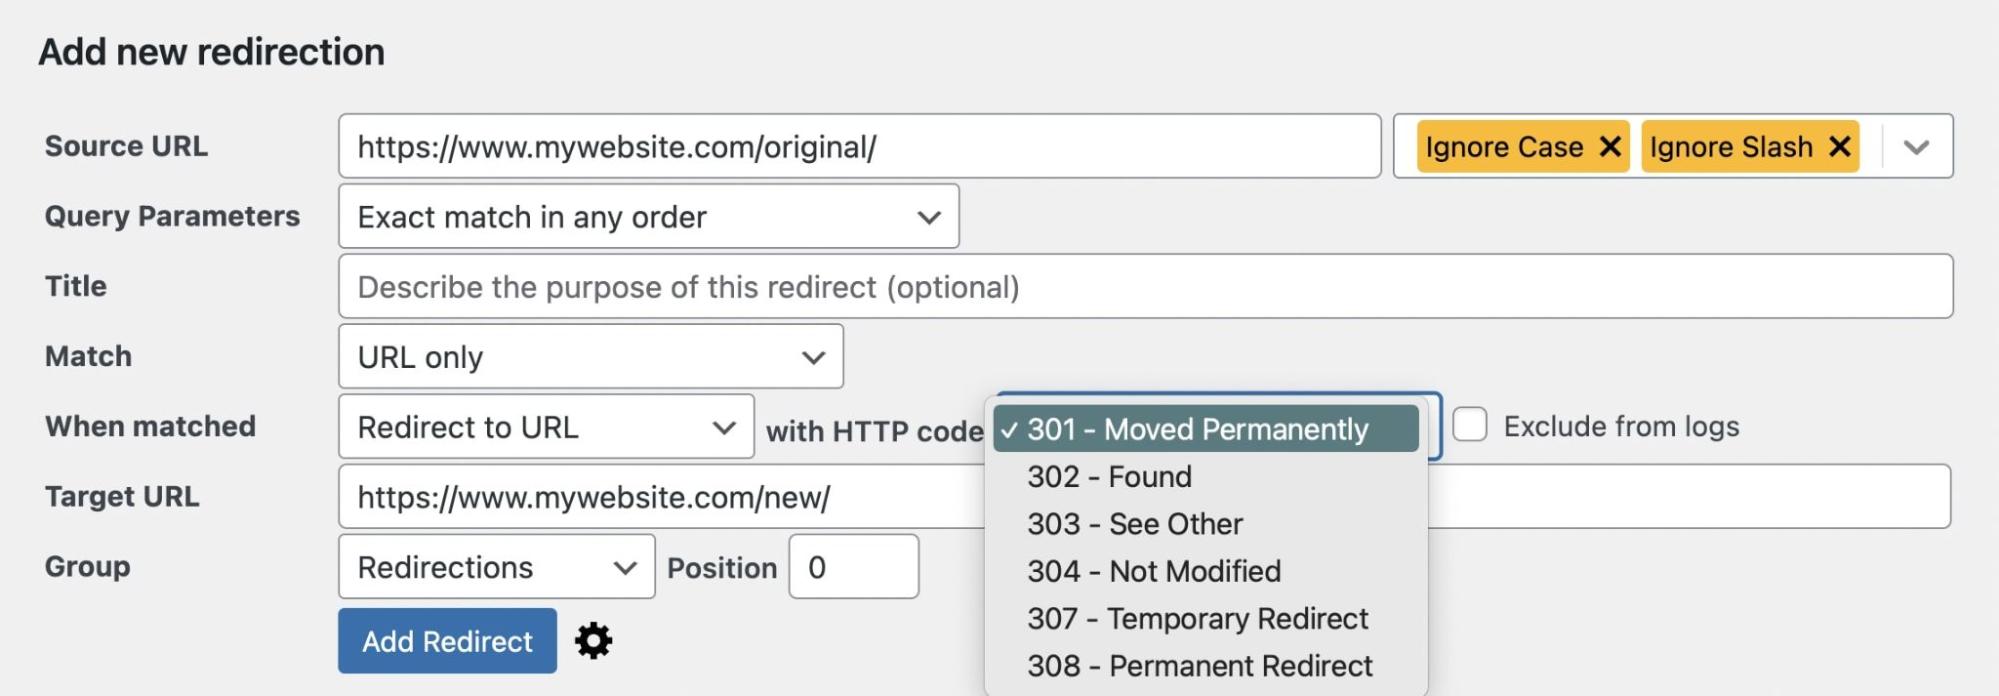
Lastly, click on the gear icon to open additional settings. Be sure to select a 301 – Moved Permanently HTTP code:
When you’re finished, hit Add Redirect. Now, whenever users visit the old URL, their browser will automatically reroute to the new resource!
Method 2: Use Your SEO PluginAlthough you can install new redirection plugins like Redirection or Simple 301 Redirects, you may already have all the tools you need to create redirects on your website. Often, SEO plugins provide redirection managers along with Search Engine Optimization features.
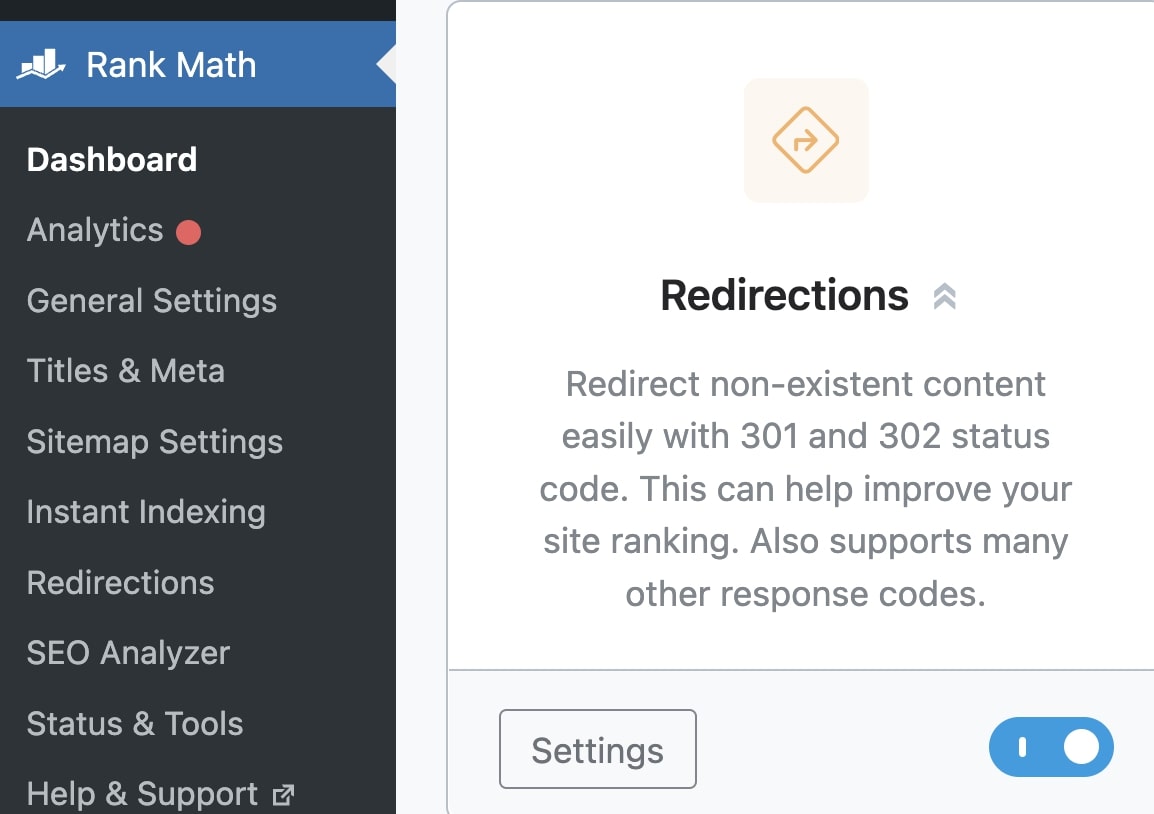
Rank Math is a free SEO plugin with built-in redirection tools. With this tool, you’ll be able to enable, disable, and delete any of your site’s redirects. Plus, it even imports information from the Redirection plugin:
After you install and activate Rank Math, open the dashboard. Then, find the Redirections tool and enable it:
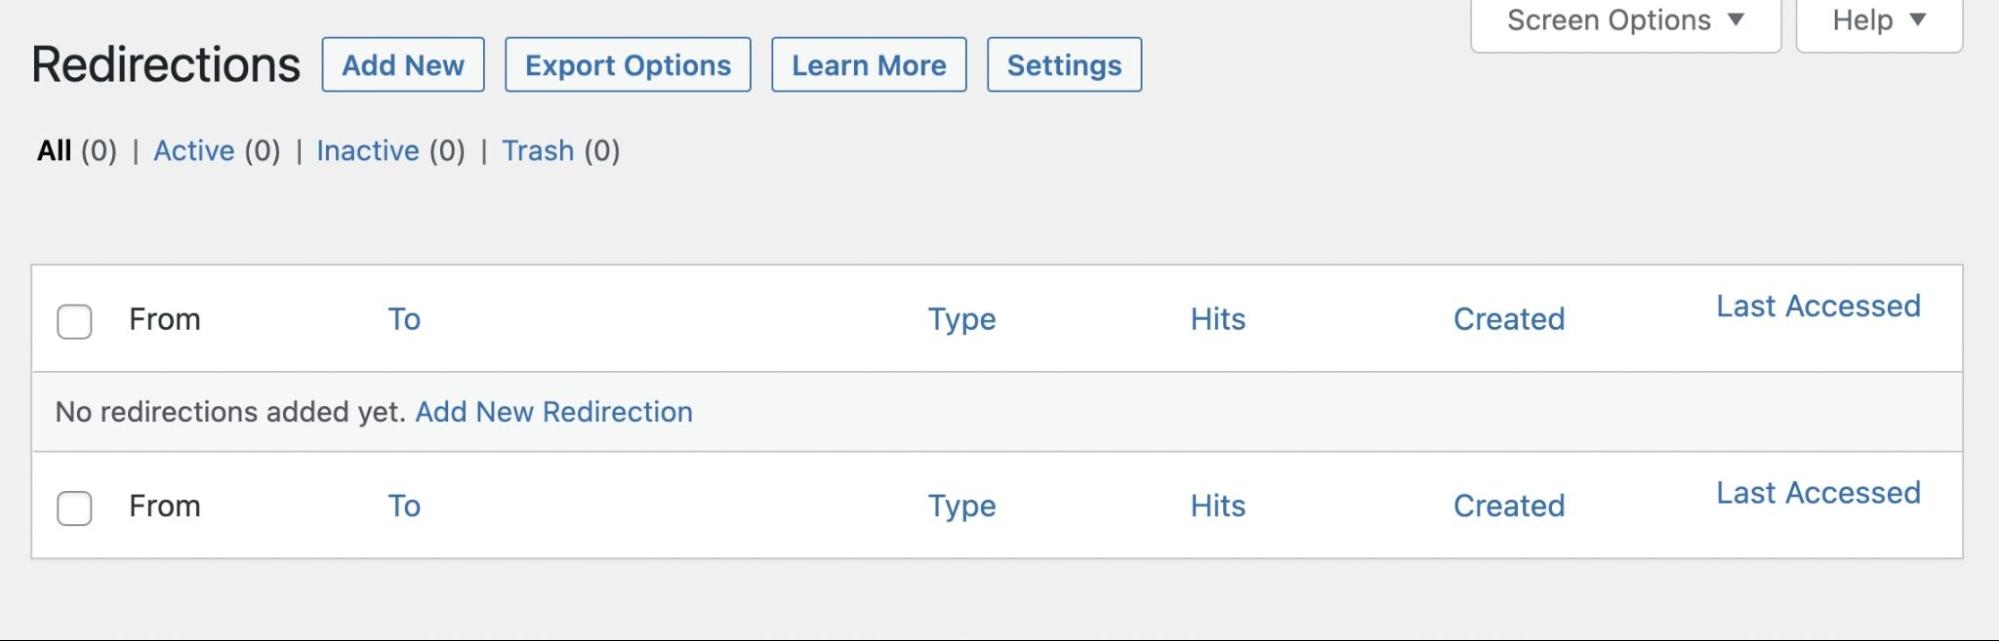
Now you’ll have a new Redirections tab. On this page, click on Add New:
First, you can add your original source URL, which will be the content you’re redirecting from. By hitting Add another, you can paste URLs in bulk. This can be an efficient way to consolidate multiple pieces of content into one source:
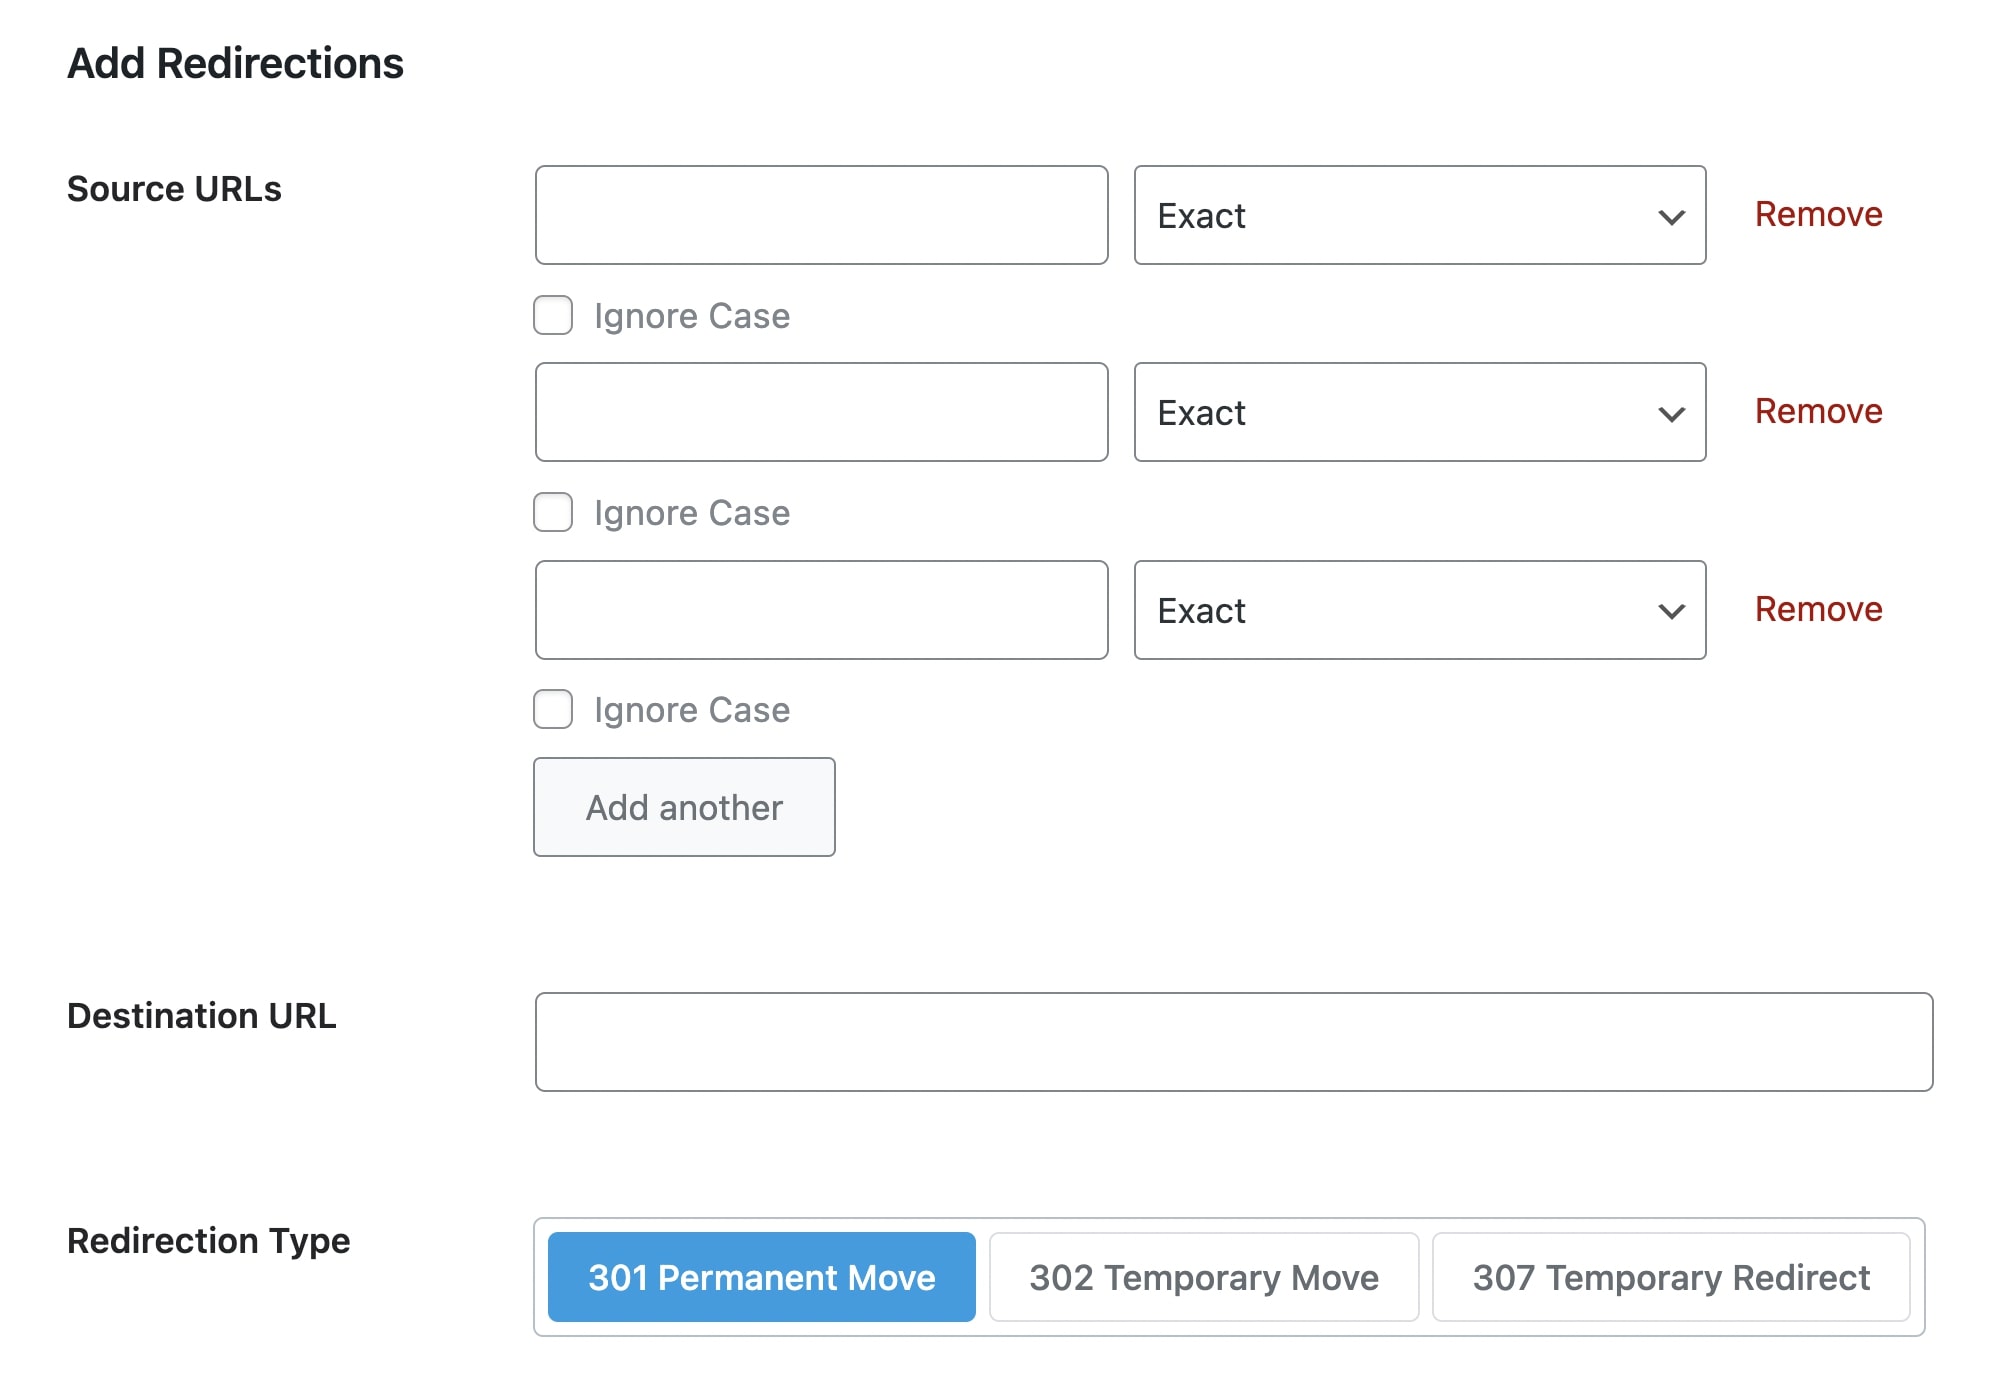
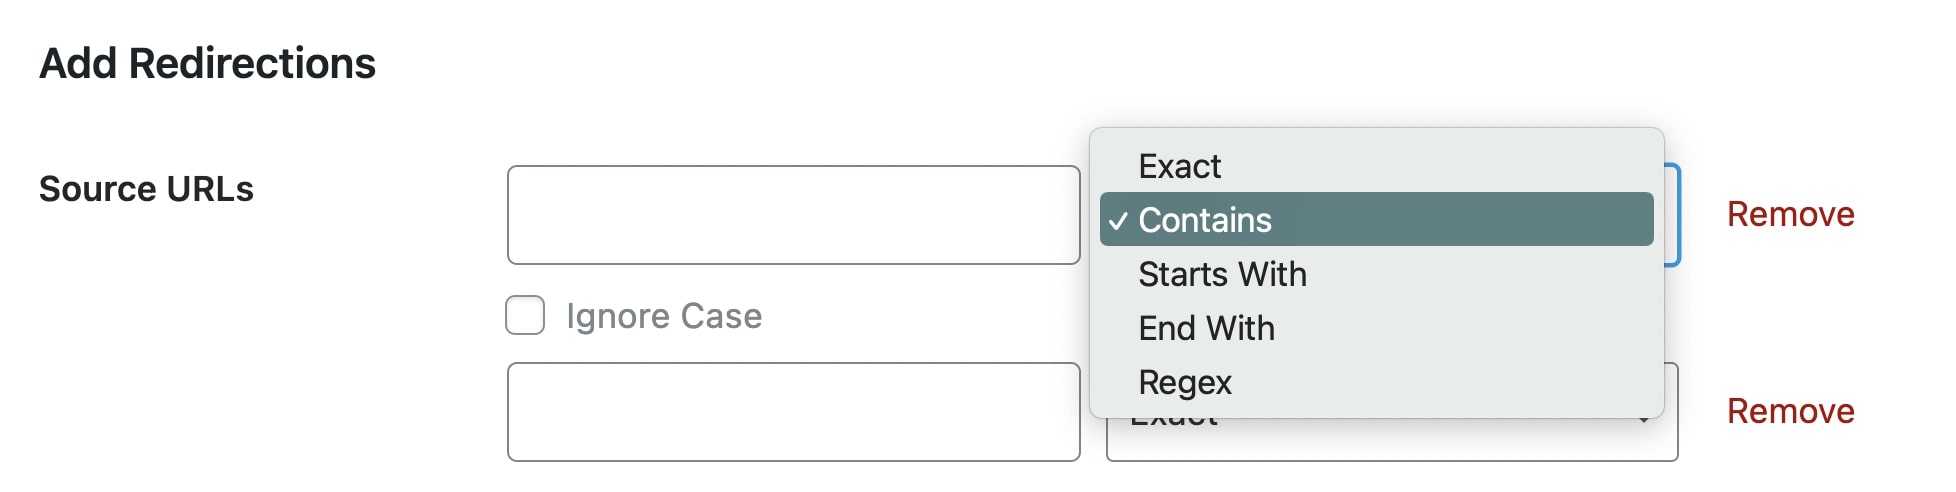
Next to each URL, choose Exact Match if you want to redirect this exact link. However, you can also enter a more general term. By selecting Contains instead, every page with that keyword will be redirected:
Under Destination URL, insert the link you want users to visit. Be sure to also select 301 Permanent Move as the redirection type before hitting Add Redirection.
Method 3: Edit Your .htaccess FileIf you want to avoid installing another plugin, you can also create 301 redirects manually. Since this involves editing your site files, be sure to back up your website first. This will save a copy of your current website to revert back to if anything goes wrong.
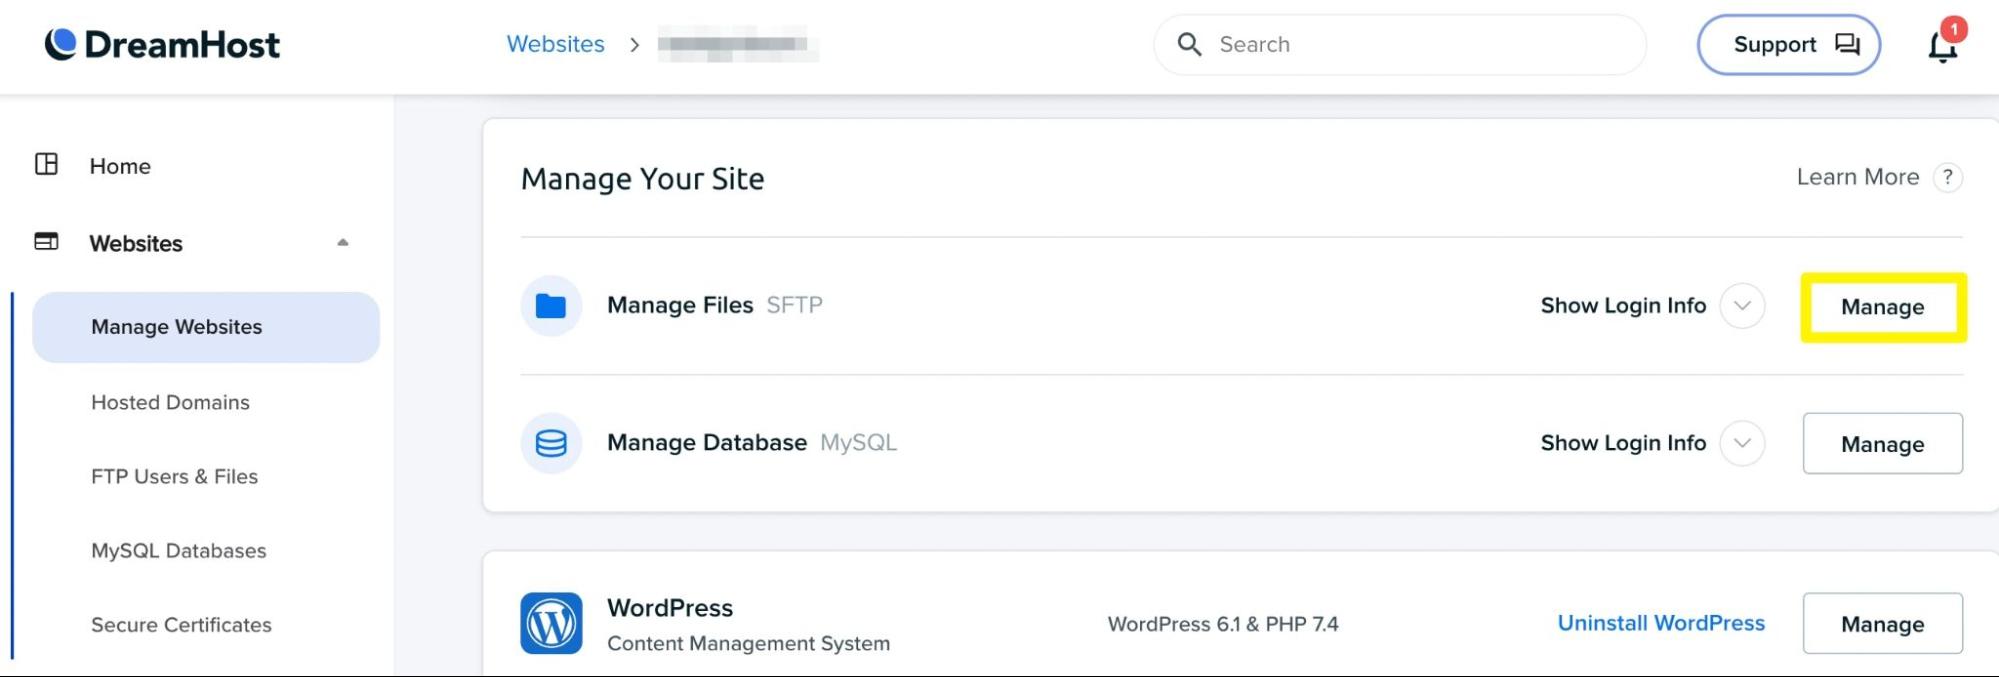
Next, you’ll need to connect to a File Transfer Protocol (FTP) client or your host’s file manager. For DreamHost users, sign into your account panel. Then, navigate to Websites > Manage Websites > Manage Files SFTP > Manage:
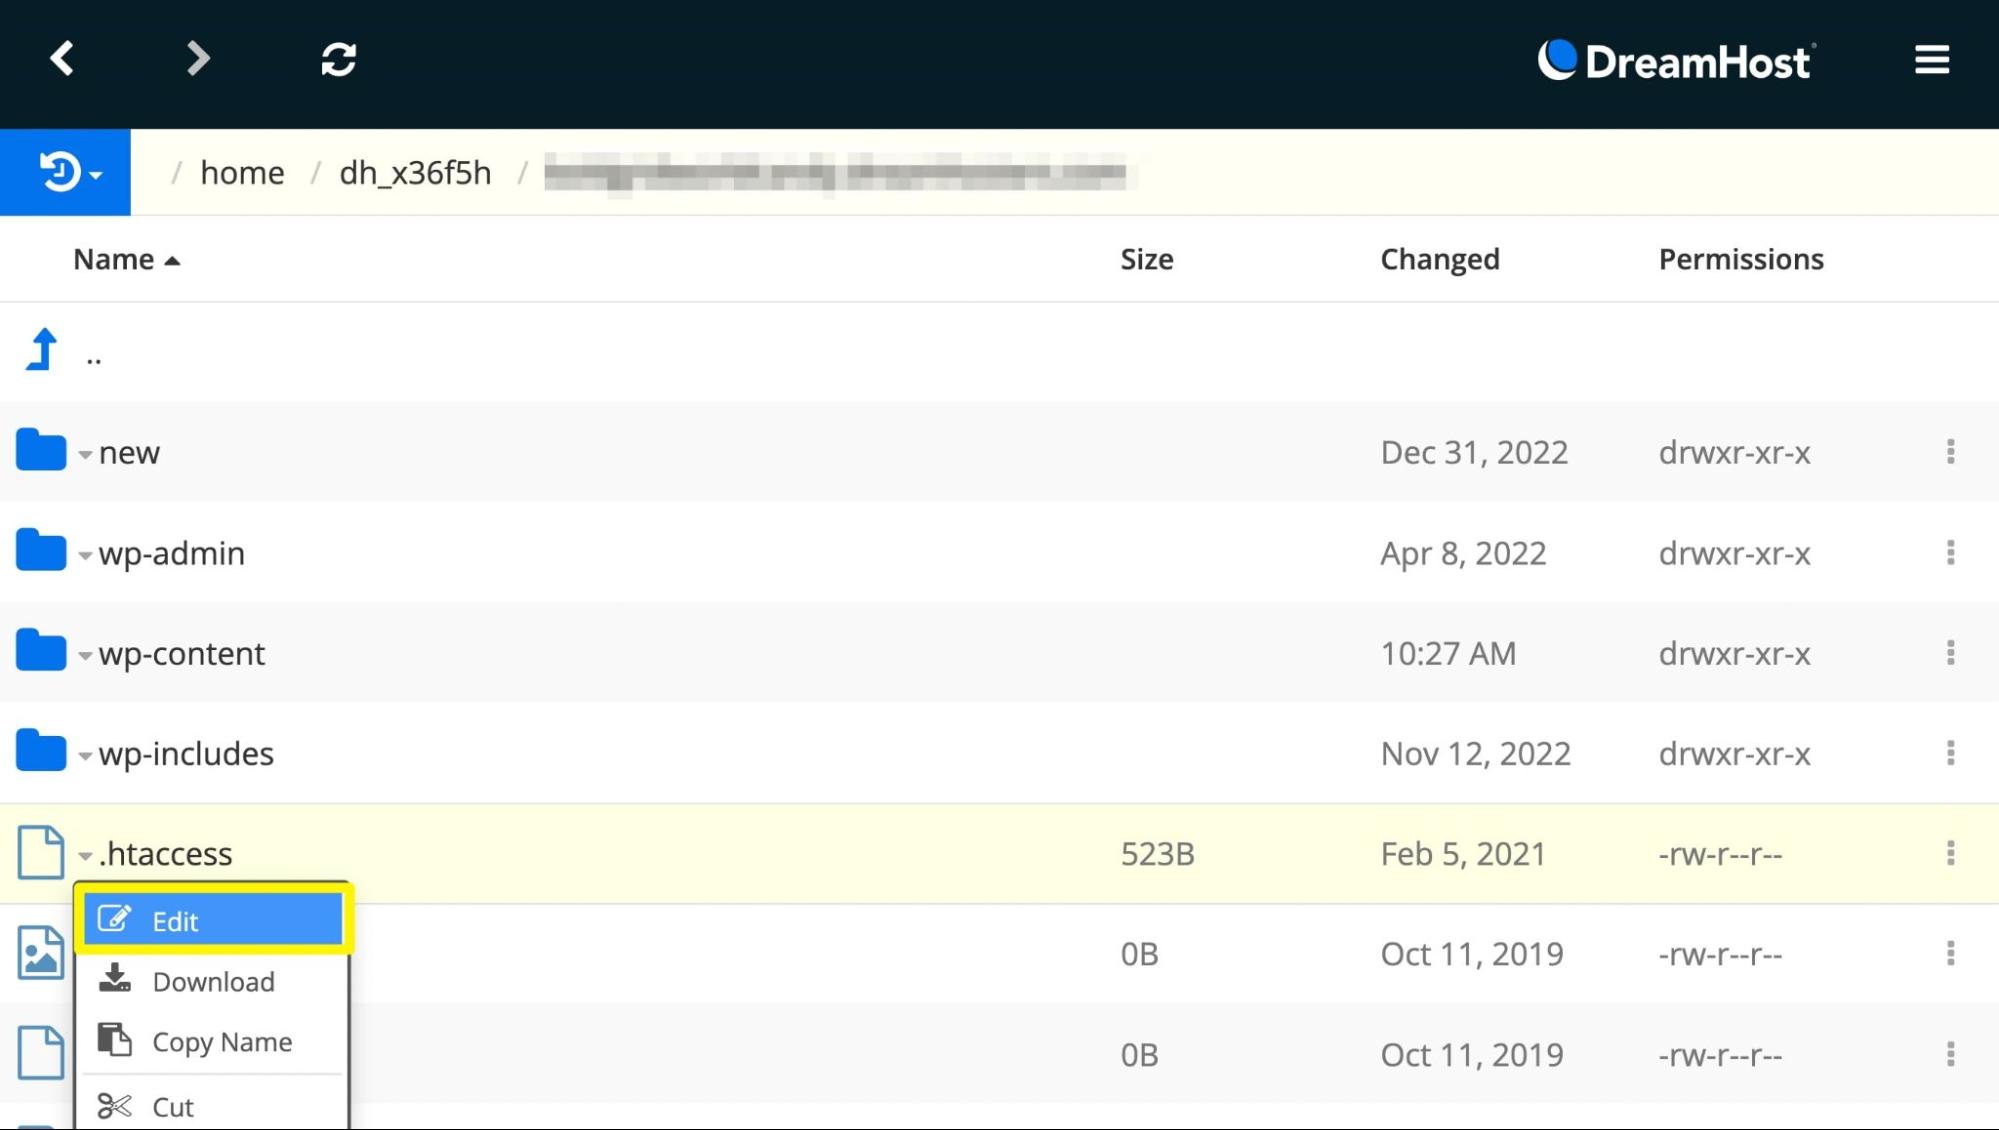
This will open DreamHost’s file manager. Here, you’ll need to find the .htaccess file within the root directory:
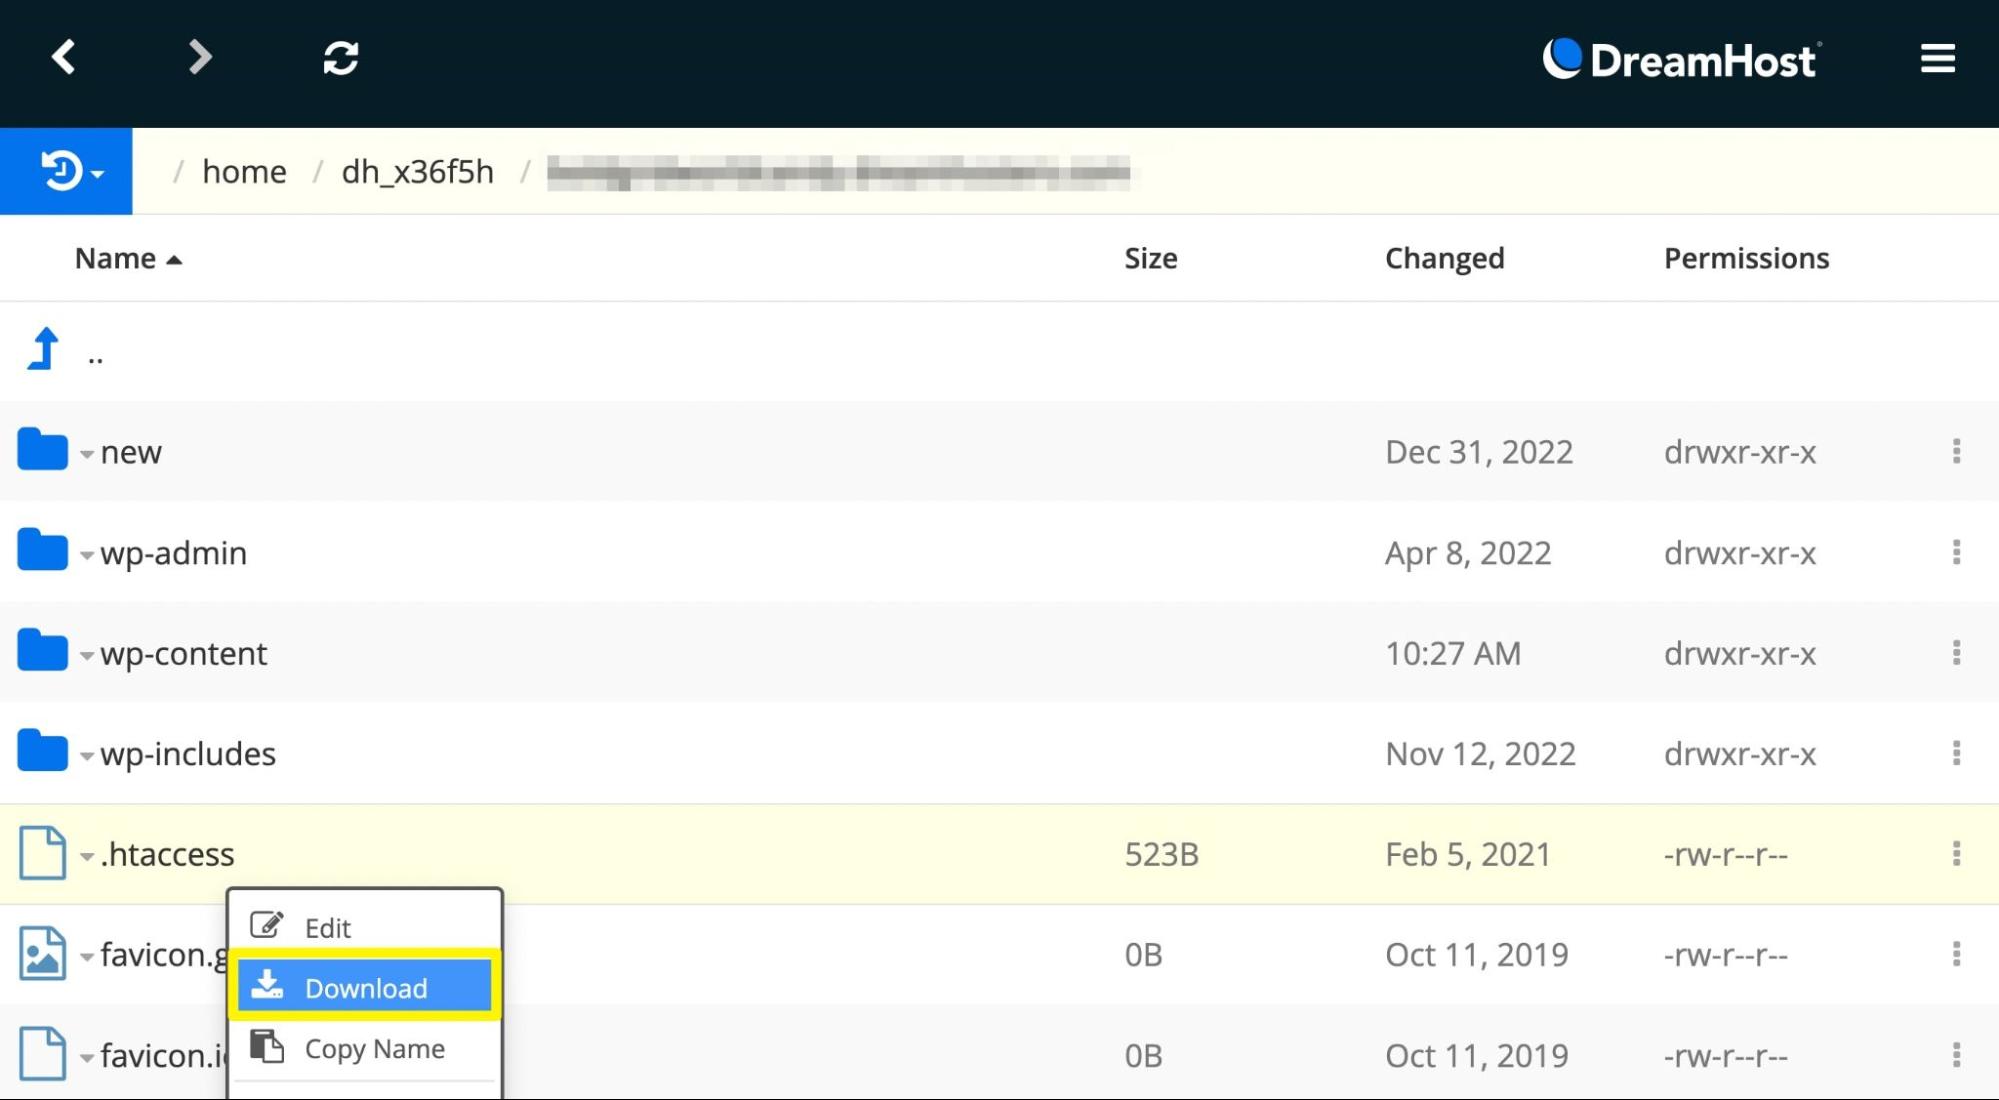
If you don’t want to back up your entire website, you can simply download this original file. If you experience any problems, you can re-upload it to the server:
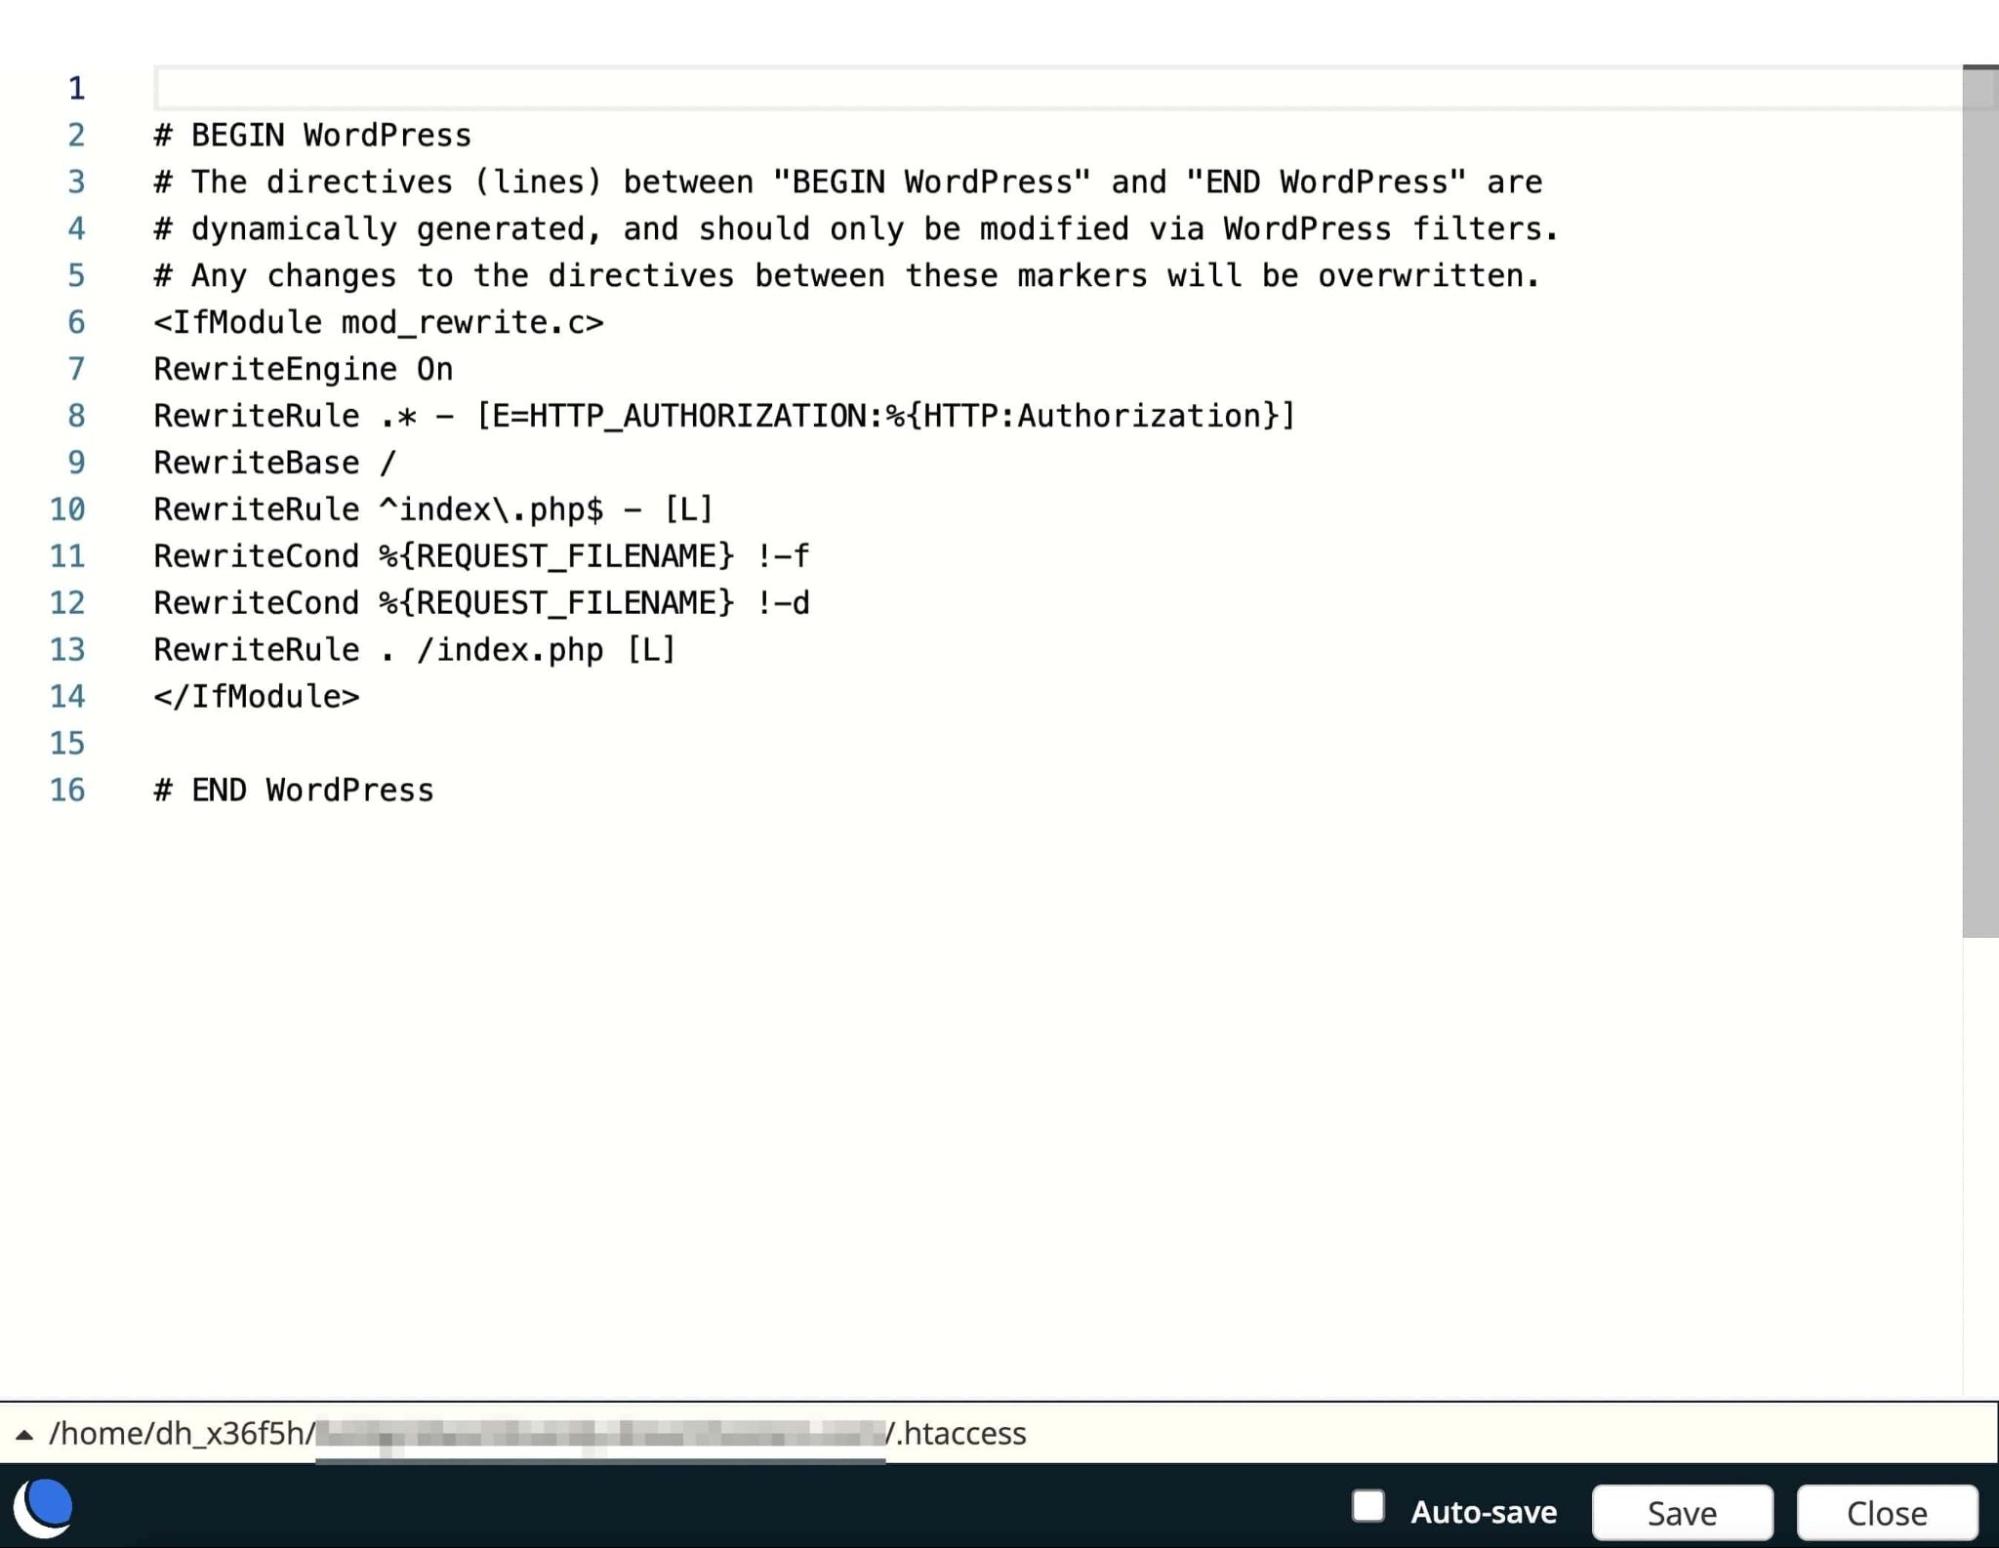
Once you locate the .htaccess file, right-click on it and select Edit. If you’re using the DreamHost file manager, a text editor will automatically open:
* This article was originally published here
Comments
Post a Comment